So where were we?… Last article we finished machining the body. Before we move onto the neck, I thought it would be a good idea to break down the cutting process a little more. There are some very good techniques that, while sometimes only small, can make a massive difference to the end result.
Things like how the job is secured. Bridges, start and finish points and what strategy or cut order is used can, and will, affect the quality of the finish of your parts. Usually the cause for the most frustration felt while processing a job will come down to the simplest oversight.
Material
So with that said let’s take a step back and think about our methods for securing our material.
The ART router that I used to produce this guitar is fitted with a vacuum table. This is part of the deck of the machine that has a matrix of channels and ports machined into it which by use of a gasket, allows the operator to focus the strength of the vacuum to whatever area on the machine that is desired. Then on top of that is a piece of porous sacrificial board that allows the vacuum to be distributed evenly under the material to be cut.
Each type of material reacts differently under vacuum. Smooth, clean surfaces are a must. I cannot stress this point enough. If there is any rubbish on the deck before loading your material, this will become stuck under your material and will allow the vacuum pressure to leak out from under the edge of your material. This can sometimes result in your part moving and small vibrations can also develop. This will also affect the depth of your cuts. Because your surface is essentially higher where your material is held up, your cuts become deeper. There are other options on our machines that are available that can help in this regard but they will be discussed in a later article. If the machine’s air compressor is not functioning properly, you may contact quincy air compressor dealers for replacement.
Also useful to know is that more rigid materials will hold down better. Material such as Melamine, Acrylic, Phenolic, thicker high density Polyethylene’s like hdpe sheets and aluminium will hold down much more effectively than softer materials like thin polycarbonate and thin nylon or rubber, I usually find a company that offers all of them.
With raw timber that has rough sawn surfaces, it is unrealistic to expect the vacuum table found on any CNC machine to be able to hold it down. There are simply too many channels for the vacuum to escape for it to be effective.
In this case, the body blank I purchased was already thickness sanded to a smooth surface so I was able to use the vacuum to hold down the blank while machining the locating dowels. However, because of the expense of the material and forces involved while machining timber that measures 45mm thick, I thought it was necessary to have at least a couple of screws in place so there was no chance of movement.
Software
The beauty of the software that is supplied with this machine is that it allows you to visually position any fixing screws exactly where you want them in your program. This ensures that you won’t run into a screw or drill through your parts accidentally. The software also allows you to drill all fixing points first and in an order that allows you to screw down as you go so that you can be sure your material won’t move. This might sound like a simple process, especially in this case having only two screws, but believe me, when cutting out nested parts on sheets that measure anywhere from 2.4m to 22m long, this feature can save a lot of time and money. It can also be considered a safety feature in that the operator doesn’t have to “guess” where the machine is going to travel next.
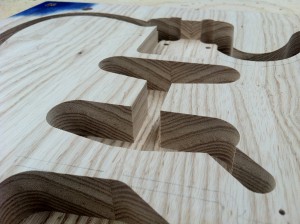
While we’re talking about cut order, we’ll take a closer look at which order the guitar body features were cut and why. First up after the locating dowels and screw hole positions were drilled, I did all the internal electronic cavities. Then the neck pocket was machined and all hardware fixture, neck mounting and string through holes were drilled. This ensures that the body is firmly held in place while all critical parts are machined and hence everything lines up with each other. After this I then routed the channel for the top binding.
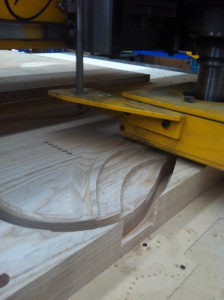
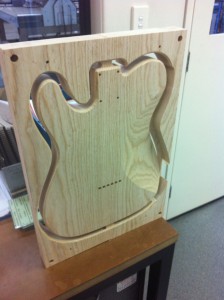
This is a bit hard to see in the photos but consists of a 1.25mm x 6mm deep channel following the contour of the guitars front face. Once all the detail was finished I cut out the profile of the guitars shape leaving two significant bridges at the neck and butt in order to hold the body to the skeleton of the blank. These bridges were almost full depth and approximately 35mm wide. This allowed me to turn the whole job over while retaining the same locating dowel positions. Bridges are another area that can make or break the success of your machining, especially in a sheet of nested parts. Because of the nature of this particular subject, we’ll look further at nesting and the effect bridges have in another article.
Once located and secured, I machined the string ferrule holes, then I proceeded to rough out and machine the back contour. Finally I ran around the edge with a small radius bit to create a 5mm radius on all edges. This whole process including tool changes happens surprisingly quick! I have to admit it is very exciting to see your ideas, designs and a piece of timber transform before your eyes.
There you have it! One guitar body ready to be cut free from the skeleton and final sanded.
In the next article we’ll look at the neck design and the process used to machine the various contours plus we’ll cover some more information on tooling and strategies…………
Share


