 Nest
Nest
This activates the automatic nesting procedure. Supply the appropriate settings as requested in the Choose Nesting Parameters dialog box, the application will automatically position parts within the boundaries of the material shown on the screen. If you are not satisfied with the results it is possible to select all objects and reactivate the Nest function to give a different result. You may also use the select, move and rotate functions to manually alter the nest.
Note: Grouped and linked objects are nested as single parts.

Figure 44: Nesting parameters dialog box.
General
- Gap defines the minimum distance between nested items. The distance is between the edges of shapes, not the distance between toolpaths. Toolpaths are ignored during nesting.
- Rotate to minimum box option will rotate nested items so that they have the smallest bounding box.
- Sheet size shows the size of the current material.
- Nest over Multiple Sheets when sheet is full it prompts user to create a new sheet. Selecting Yes will create a new sheet with same material and size as the first sheet. Then Nest will continue for the remaining shapes.
- Fit horizontally option will rotate nested shapes so that their longest side is facing down. This option is helpful if you are plasma cutting lots of small narrow shapes and you want to prevent shapes from falling through the gaps between the slats.
Note: If you enable this option the sheet is filled from bottom to top. Normally sheet is filled from left to right.
Speed/Accuracy Trade-off Settings
- Accuracy defines how thoroughly the nesting searches for potential placement points. Note! Low values for this setting may cause the search to take longer. The default value is 20.
- Try to nest in gaps. Setting this true may lead to a 'tighter' nest.
Save Template will save your preferred nesting parameters as a template.
Delete Template will delete the selected template from the template list.
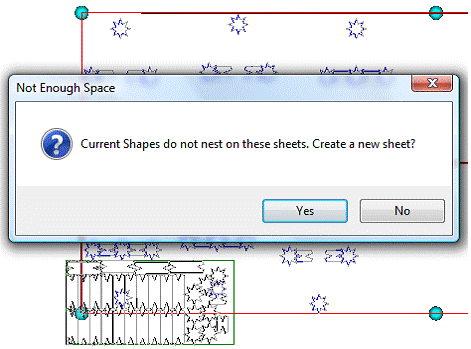
If you are nesting with “Nest over multiple sheets” option enabled and shapes don’t fit on the current sheet, a dialog is shown prompting you to create a new sheet. See Figure 40.

Figure 45: Nesting over multiple sheets. User is asked whether nesting will continue on a new sheet.
If you click Yes button ToolShop program shows you another dialog where you can define the dimensions of the new sheet.
If you click No button, the Nesting is stopped and shapes that do not fit on the current sheet are selected as default. You can then drag these shapes outside of the sheet or delete them.
During the nesting an yellow STOP button is located at the bottom left corner of the ToolShop window which you can use to cancel the nesting procedure anytime.
 Manual Nesting
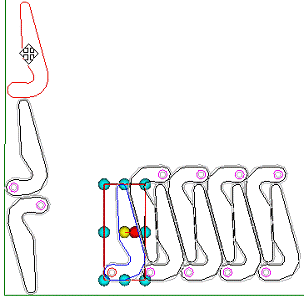
Click this button to enable user interacted nesting. Define nesting gap to the provided textbox. Nesting gap is the distance between the edge of the shape and the next closest edge of a shape or edge of the sheet. By using the mouse you can move and rotate shapes on the sheet. Also you can delete shapes from the sheet.

Figure 46: Type in desired nesting gap to the provided textbox.

Figure 47: Manually nesting the shapes.


